Introduction
This document outlines some of my experiences with setting up Docker Swarm on an Azure Cloud. This post targets people who have some Docker experience, and that might have already deployed a Swarm cluster on-premise, or on cloud infrastructure, but haven’t taken a look at deploying it on Azure yet.

There are many ways on how to get Docker up and running on Azure, and choosing the right way isn’t always that straightforward.
For example :
- Option 1 : You can spin up some VMs and install docker yourself
- Option 2 : You can go to the Microsoft Marketplace and use a Docker CE Template
- Option 3 : You can use the Azure Container Service, and use Swarm as your orchestrator
- Option 4 : You can use the Docker Azure template provided by Docker
We’ll go over the different options, and explain why we decided to use the Azure template provided by Docker to setup our Swarm cluster on Azure.
As we want to focus on setting up Swarm as a service on the Azure cloud platform, we’ll skip the first 2 options, as
- They don’t do much beyond giving us a basic Docker environment.
- You would still need to step up your Swarm Cluster manually and find a way to add nodes to them.
Docker Swarm
Before we continue, it’s important to know that there are in fact 2 different ways to use Docker Swarm
- Docker v1.12 and up includes
Swarm modefor natively managing a cluster of Docker Engines called a swarm. - Docker < v1.12 can only use
Standalone Swarm, where the Swarm functionality is offered through a docker container.
Docker recommends upgrading from standalone swarm to native swarm when possible, and for greenfield deployments, native Swarm mode is your best bet.
The third option, using the Azure Container Service seems very interesting, as it is a managed solution by Azure, but according to the template documentation is designed for Docker versions earlier than v1.12, and as such can only use the standalone swarm mode for which Docker Swarm was still distributed as a separate container so we’re not going to focus on those.
So we’ll go for option 4, where a template provided by Docker will provide us a running Swarm cluster in a couple of clicks.
But before we do that, we first need to setup our Azure CLI.
Setting up Azure CLI
When the Azure CLI has been setup, you’ll need to login. You’ll be prompted to enter a code in your browser. After that that command will continue :
az login

To sign in, use a web browser to open the page https://aka.ms/devicelogin and enter the code C3H44PMX7 to authenticate.
The command should return a json similar to this:
[
  {
    "cloudName": "AzureCloud",
    "id": "xxxxxxx",
    "isDefault": true,
    "name": "Free Trial",
    "state": "Enabled",
    "tenantId": "xxxxxx",
    "user": {
      "name": "xxxxx",
      "type": "user"
    }
  }
]
After having logged in, you can execute az commands, like the az account show showing you some account information :
{
  "environmentName": "AzureCloud",
  "id": "c1ddf2e6-8c94-490c-a1f0-e54d24f76323",
  "isDefault": true,
  "name": "Free Trial",
  "state": "Enabled",
  "tenantId": "930763d2-b2ba-4d30-bd7b-908bbf4ac227",
  "user": {
    "name": "davy.dewaele@ixor.be",
    "type": "user"
  }
}
Docker for Azure
The method we’ll be using to setup Docker Swarm on Azure is by using an Azure template that is created by the Docker Team (and not Microsoft). By using this theme we’ll be able to make use of the latest Docker / Swarm versions, while still integrating nicely with the Micosoft Azure Cloud.
So lets get started.
Creating the ServicePrincipal
Before we can get started with Docker for Azure we to create a Service Principal in our Active Directoy. Think of this as a user that has permissions to do low level infra stuff like scaling your VMs, updating your loadbalancer rules. Operations needed for a dynamic Docker Swarm solution on Azure.
There are 2 ways to create a service principal
- Via a docker container, as outlined in Docker for Azure guide
- Via the Azure Portal (in the Active Directory module, by creating an app registration).
We’re going to use the command line and spin up the docker container takes 3 arguments
- The Service Principal Name
- The Resource Group Name
- The Azure Region
The command looks like this:
docker run -ti docker4x/create-sp-azure sp1 swarm1 westeurope
This will create
- An Active Directory Application allowing swarm to scale / expose ports / ….
- A ServicePrincipal (with an App ID and App Secret)
- A resource group
You’ll need to login via your browser to kickstart the CLI. After that you will get a nice summary at the end.
Your access credentials ==================================================
AD ServicePrincipal App ID:       98369e6d-9d9c-419d-86fa-075ce0cdcc83
AD ServicePrincipal App Secret:   FITLMrNLMpokhi3YvZPbm7y36FDsUkXn
AD ServicePrincipal Tenant ID:    930763d2-b2ba-4d30-bd7b-908bbf4ac227
Resource Group Name:              swarm1
Resource Group Location:          westeurope
You can look at the portal to see that the service principal has been created.

The AppID and App Secret will be needed when running the Docker template.
There are 2 ways to install the Docker for Azure offering
- Via the Azure UI, by following the Docker for Azure template link
- Via the Azure CLI, allowing you to automate the deployment further.
We’ll cover both options
Installing Docker for Azure using the Azure UI
Follow the steps in the Docker for Azure guide. When clicking the button to install Docker for Azure, you’ll be redirected to the Azure portal where you will be prompted to fill in some properties like
- AppID
- App Secret
- Public SSH Key
- Number + Type of workers
- Number + Type of managers

It will take a couple of minutes to create the entire stack. You can monitor the progress in the notifications window.

When the deploymnent is finished, you’ll be redirected to the overview section of the resource group. Here you’ll find all the resources that were created using the Docker for Azure template.

The template has created a number of resources including:
- Public IP for the loadbalancer (for exposing your apps)
- Public IP for the SSH load balancer (for SSH-ing into your swarm manager)
- VM Scale Sets, capable of spawning virtual machines
- Load balancers
- Virtual Networks
- Storage accounts.
Installing Docker for Azure with the CLI
You can also install Docker for Azure using the CLI.
Again, make sure you have created the Service Principal
docker run -ti docker4x/create-sp-azure docker-for-azure-sp docker-for-azure-rg centralus
And then create the deployment.
az group deployment create --name docker-swarm-deployment --resource-group docker-for-azure-rg --template-uri https://download.docker.com/azure/stable/Docker.tmpl
Please provide string value for 'adServicePrincipalAppID' (? for help): xxxxxx
Please provide securestring value for 'adServicePrincipalAppSecret' (? for help): xxxxxx
Please provide string value for 'sshPublicKey' (? for help): ssh-rsa xxxxxx
You’ll need to provide
- adServicePrincipalAppID
- adServicePrincipalAppSecret
- public SSH key
If you have a parameters file like this
{
  "$schema": "https://schema.management.azure.com/schemas/2015-01-01/deploymentParameters.json#",
  "contentVersion": "1.0.0.0",
  "parameters": {
    "adServicePrincipalAppID": {
      "value": "2069aee6-5520-4790-8cc1-ae4e745e01bc"
    },
    "adServicePrincipalAppSecret": {
      "value": "34279fd7-1fd5-451b-95fe-cb8f84f2615b"
    },
    "enableSystemPrune": {
      "value": "no"
    },
    "managerCount": {
      "value": 1
    },
    "managerVMSize": {
      "value": "Standard_D1_v2"
    },
    "sshPublicKey": {
      "value": "ssh-rsa xxxxxx"
    },
    "swarmName": {
      "value": "dockerswarm"
    },
    "workerCount": {
      "value": 2
    },
    "workerVMSize": {
      "value": "Standard_D1_v2"
    }
  }
}
You can do a complete silent installation of the entire stack without it prompting you for anything:
docker run -ti docker4x/create-sp-azure docker-for-azure-sp docker-for-azure-rg centralus
az group deployment create --resource-group docker-for-azure-rg --name docker.template --template-uri https://download.docker.com/azure/stable/Docker.tmpl --parameters @DockerParams.json
Connecting to docker swarm manager
In order to know how to connect to the swarm manager, you need to go to the deployment template of the swarm cluster (via the resource group)
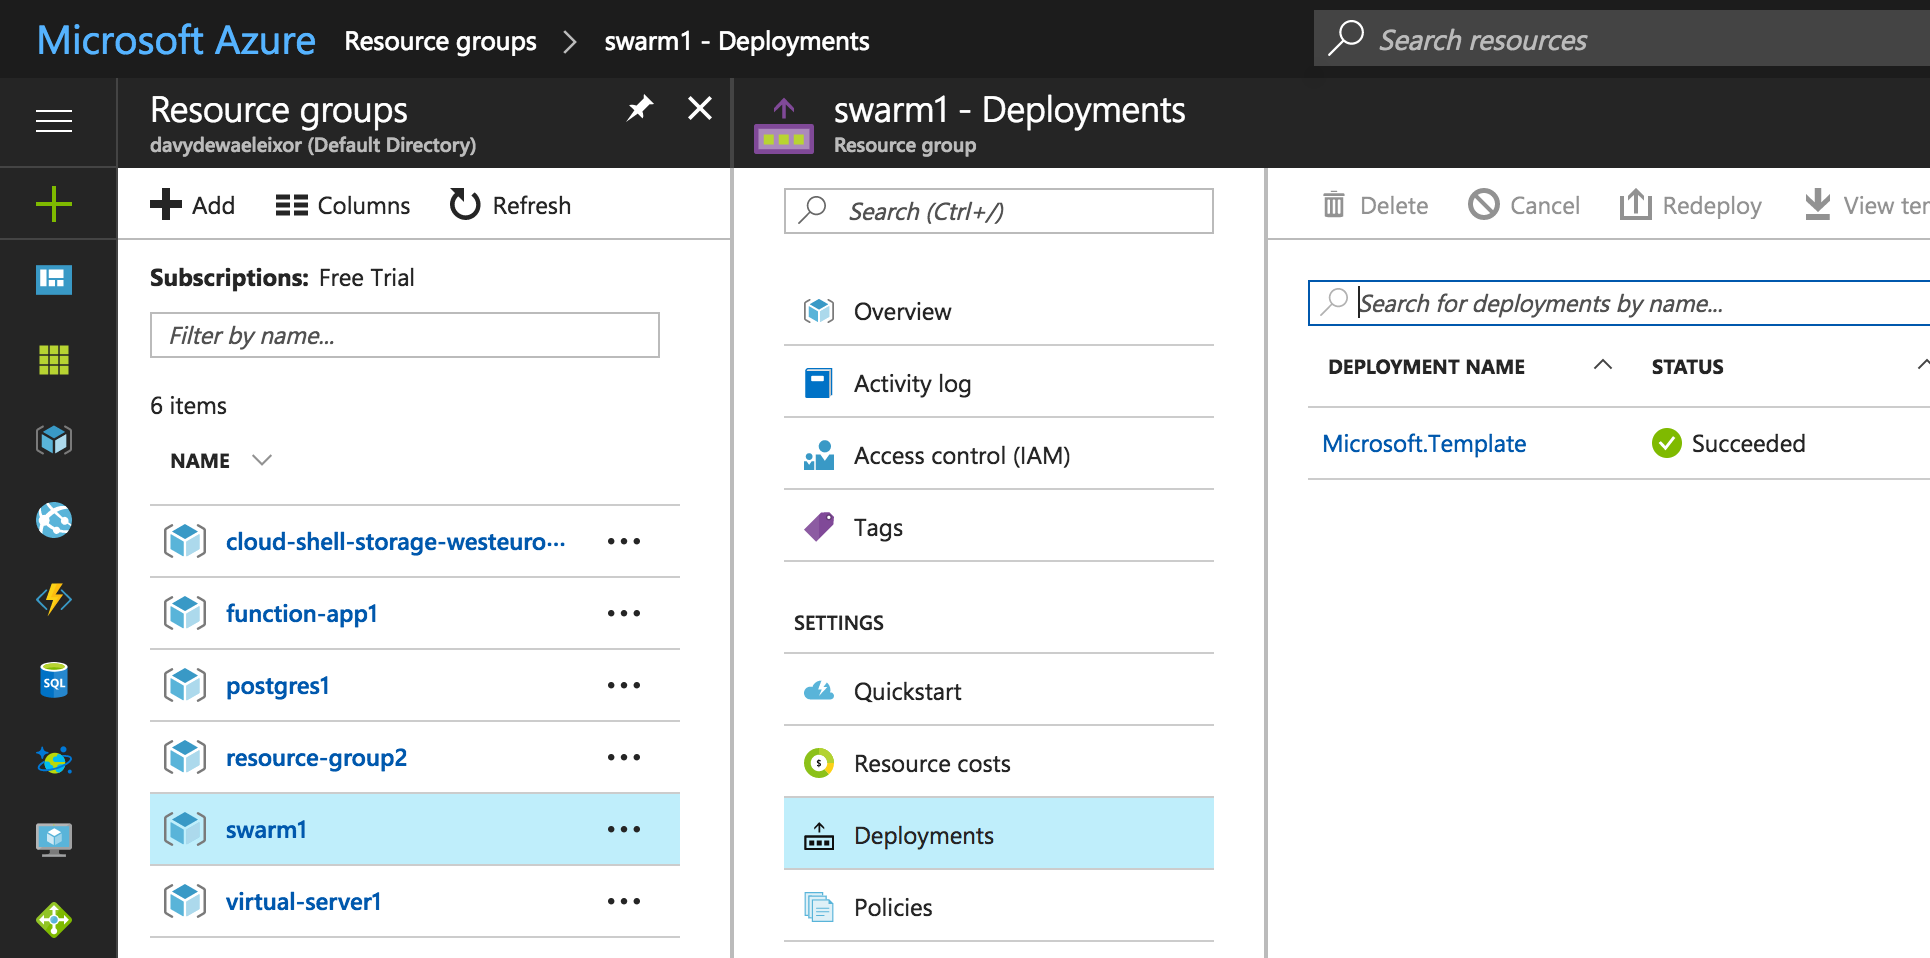
Clicking on the template you’ll find 2 interesting properties
- DefaultDNSTargets
- SSH targets

The DefaultDNSTargets gives you access to the swarm cluster. Any apps that get started there will be made avaiable on that IP. Docker Swarm services that expose a port will see their port exposed via the external loadbalancer on that IP.
The SSH Targets will show you how you can access the swarm cluster via SSH.
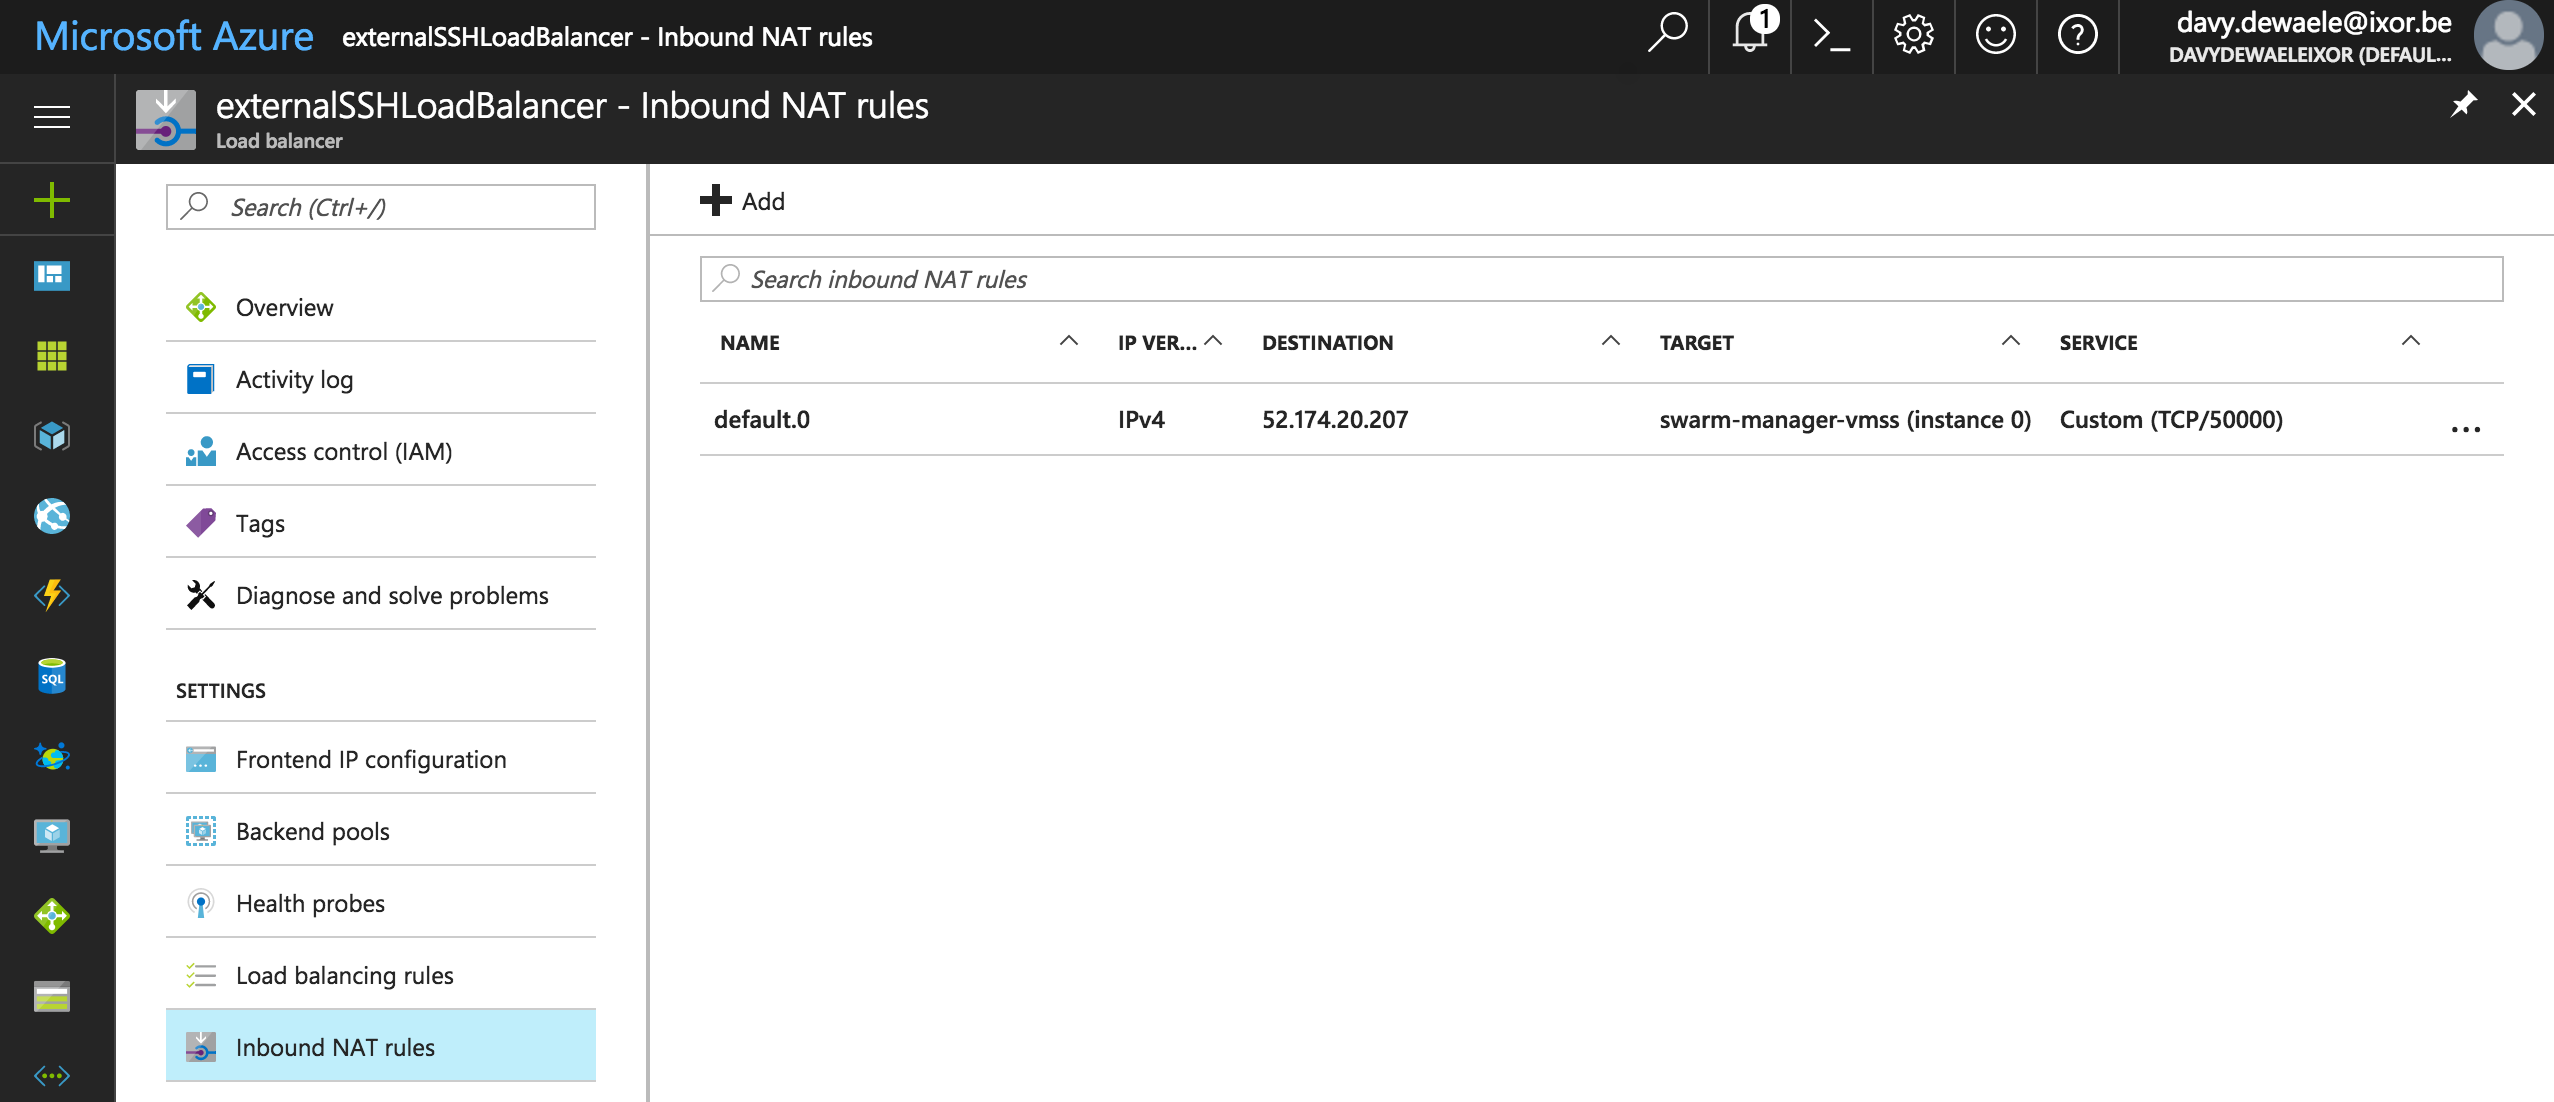
By default, the Swarm manager will listen on port 50000. To SSH into the manager execute this command:
ssh -A docker@52.174.20.207 -p 50000
Notice how I’m using SSH Agent key forwarding. This will become important later one when we want to login to the worker nodes.
But once we’re in the swarm manager, we can execute the known docker commands:
Docker version
Welcome to Docker!

swarm-manager000000:~$ docker -v
Docker version 17.06.0-ce, build 02c1d87
Docker containers
swarm-manager000000:~$ docker ps
CONTAINER ID        IMAGE                                           COMMAND                  CREATED             STATUS                         PORTS                     NAMES
1891668c2a41        docker4x/l4controller-azure:17.06.0-ce-azure2   "loadbalancer run ..."   2 minutes ago       Up 2 minutes                                             editions_controller
5069b42130ea        docker4x/meta-azure:17.06.0-ce-azure2           "metaserver -iaas_..."   2 minutes ago       Up 2 minutes                   10.0.0.4:9024->8080/tcp   meta-azure
1e55147b18b1        docker4x/guide-azure:17.06.0-ce-azure2          "/entry.sh"              2 minutes ago       Up 2 minutes                                             editions_guide
79db940f7e63        docker4x/logger-azure:17.06.0-ce-azure2         "python /server.py"      3 minutes ago       Restarting (1) 8 seconds ago                             editions_logger
456a2a2df8fd        docker4x/init-azure:17.06.0-ce-azure2           "/entry.sh"              4 minutes ago       Up 4 minutes                                             admiring_swanson
20c56749ed4e        docker4x/agent-azure:17.06.0-ce-azure2          "supervisord --con..."   5 minutes ago       Up 4 minutes                                             agent
See the swarm nodes
swarm-manager000000:~$ docker node ls
ID                            HOSTNAME              STATUS              AVAILABILITY        MANAGER STATUS
r62i4rpvp1kmxlf7goamkbsy8     swarm-worker000000    Ready               Active
rwk7lhwndmg86m4rkaa3upwmu *   swarm-manager000000   Ready               Active              Leader
vtvh17ce0qsc37ecy8k5dng11     swarm-worker000001    Ready               Active
In case you’re seeing something like this :
swarm-manager000000:~$ docker node ls
Error response from daemon: This node is not a swarm manager. Use "docker swarm init" or "docker swarm join" to connect this node to swarm and try again.
You know somethings wrong, and a good place to start is to check the logs from the init-azure docker container (see below). Errors typically arise by using the wrong Service Principal. In case of errors, you can delete the group and start over.
az group delete --name docker-for-azure-test-rg
Are you sure you want to perform this operation? (y/n): y
 | Running ..
Debugging issues
The following command will give you some insights into what happened when Azure was setting up the swarm cluster.
docker logs $(docker ps -a | grep init-azure | cut -d' ' -f1)
Connect to a worker
In order to connect to the workers you need ;
- Login to the manager with SSH Agent forwarding (-A switch)
- Find out the DNS search domain of the installation (look in /etc/resolv.conf)
- SSH into the machines
swarm-manager000000:~$ ssh docker@swarm-worker000001.oqzhphocr3cublz2fzkpyrwd5c.ax.internal.cloudapp.net
The loadbalancer
One of the items created during the Docker for Azure rollout is an external load balancer. The external loadbalancer has an IP that can be accessed from the internet. As soon as we start adding swarm services that expose a port, you’ll notice that these ports will also get exported on the loadbalancer
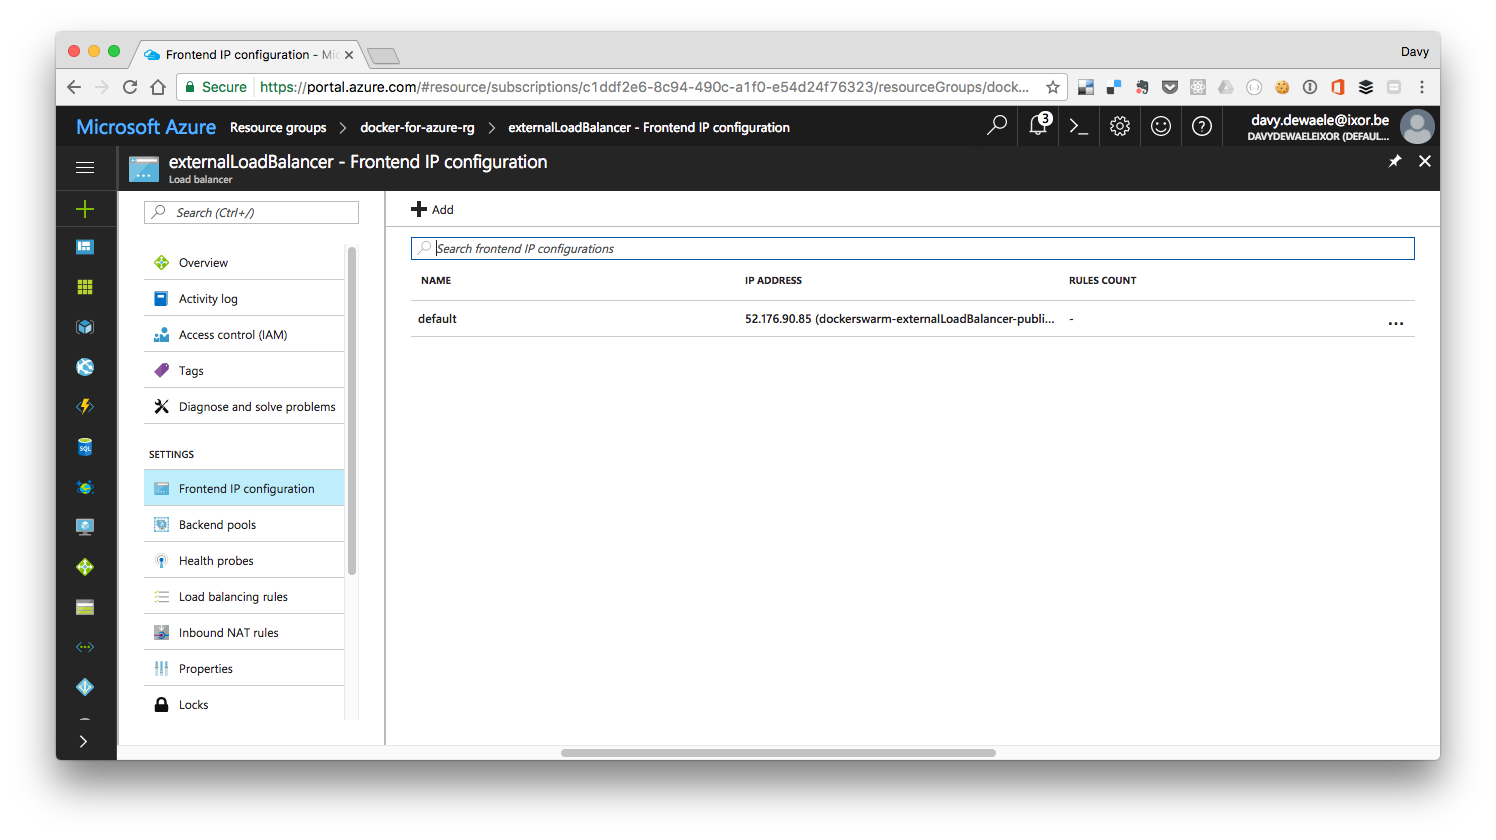
Launching services
We’ll start by creating our ntwork
docker network create \
  --driver overlay \
  --subnet 10.0.9.0/24 \
  --gateway 10.0.9.99 \
  cnet
And then start a service :
docker service create --network cnet --name nginx1 -p 80:80 nginx
Notice how we now see a rule associated with our loadbalancer
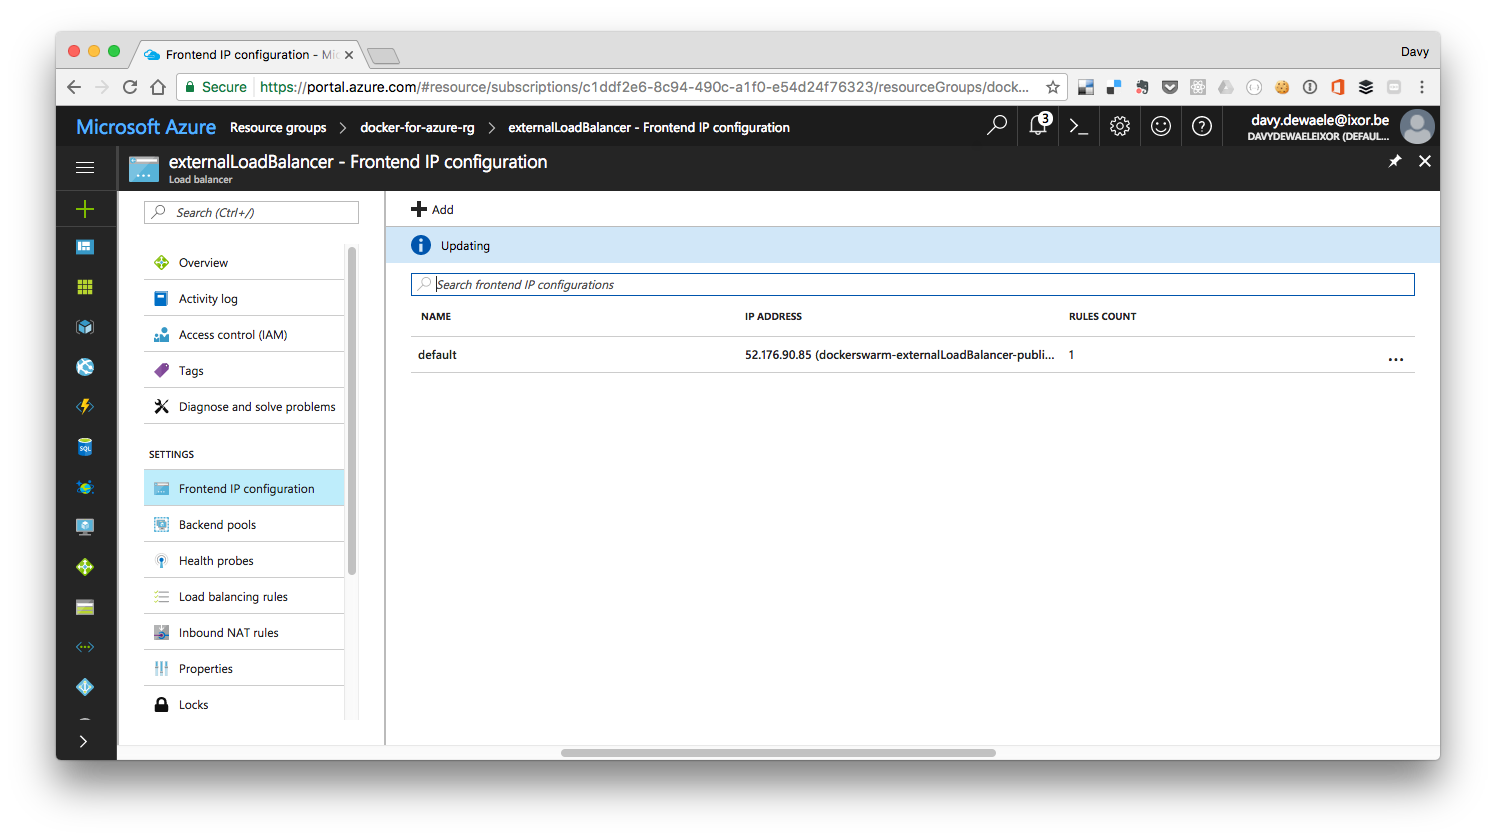
And if we look more closely, we indeed see the loadbalancer rule that will forward the external traffic on our loadbalancer on port 00 to our Swarm service (also running on port 80)
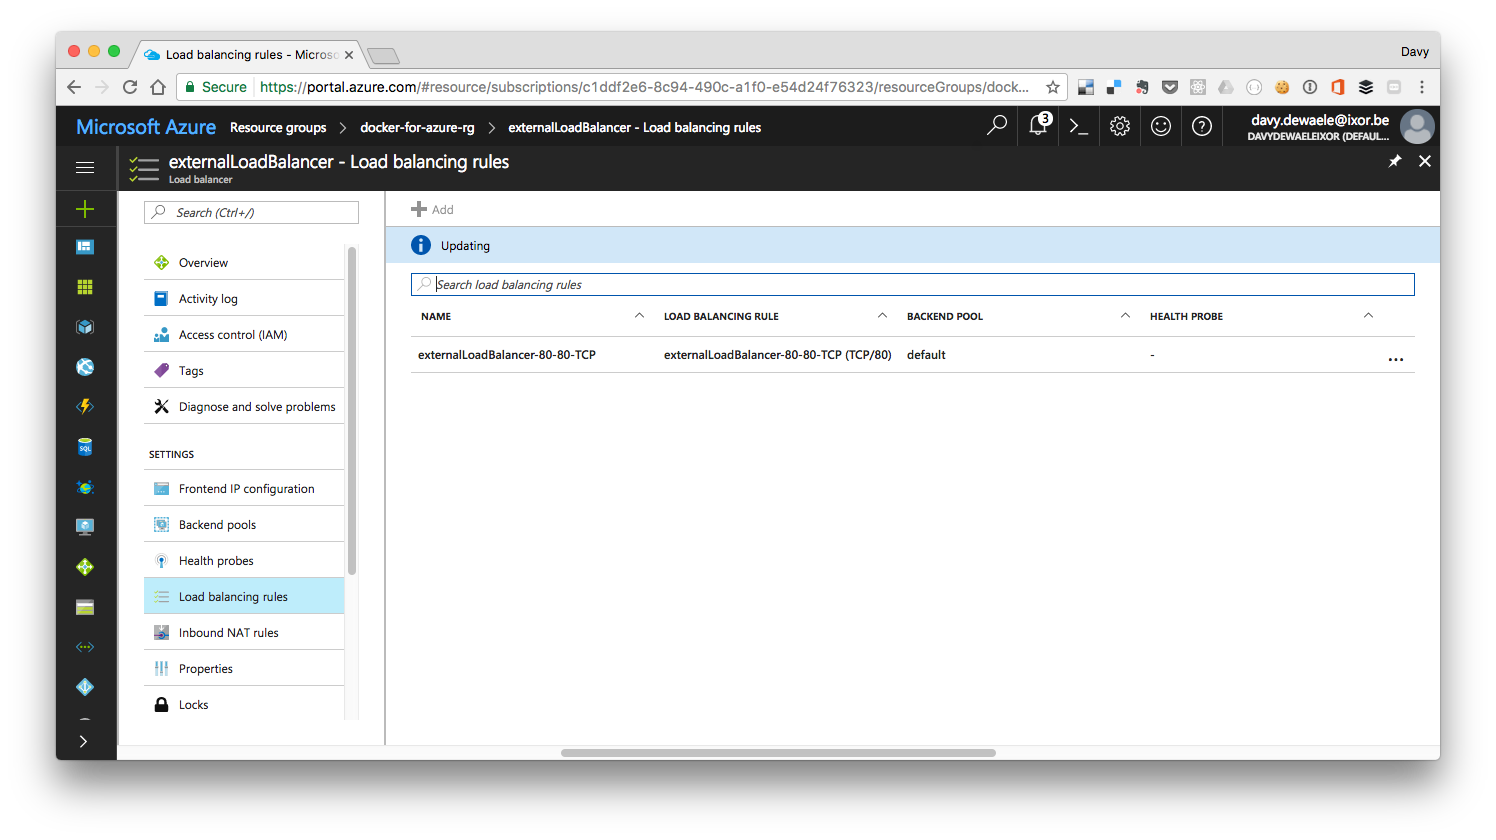 These services will become available immediately via the loadbalancer
docker service create --network cnet --name nginx2 -p 81:80 nginx
docker service create --network cnet --name nginx3 -p 82:80 nginx
docker service create --network cnet --name nginx4 -p 0:80 nginx
docker service create --network cnet --name nginx5 nginx

docker service scale nginx3=10
Docker logs
With all these containers getting spawned, it’s important to be able to read logfiles to get better insights into your containers.
You’re probably familiar with the docker logs command to read the logs coming from a container, but in Azure, when trying to look at docker logs, you’ll get the following error:
swarm-worker000001:~$ docker logs -f d7e9d806f872
Error response from daemon: configured logging driver does not support reading
Docker for Azure uses a different logging driver, and uses a logger-azure container to ensure that all logs from all containers get centralized.
If you look at the resource group used to create the docker swarm, you’ll see a storage account called on6fwskwzstvqlogs.

When you connect to this storage account, Azure will show you the cmds to connect to it from windows or linux

On Linux, you can mount the logs folder on a virtual server in the same region. (it doesn’t work on the Docker Swarm VMs)

To mount the logging folder, simply execute the following commands :
mkdir -p  /var/logs/docker
sudo mount -t cifs //le66r7q7iia3klogs.file.core.windows.net/docker4azurelogs /var/logs/docker -o vers=3.0,username=le66r7q7iia3klogs,password=O3dZUOQwAPxh/z0qC7/L9gjQx5BLaFDf+IKZkvaQ1v/xlHW5wEC7m/cxLxaVqOejy5mKU1UTOtZE8ksVwQTPVQ==,dir_mode=0777,file_mode=0777,sec=ntlmssp