In this guide I’m going to show you how you can use the Hawkbit API to generate key resources. Hawkbit comes with a great API to create the following entities :
- Software Module Type
- Software Module
- Distribution Set Type
- Distribution Type
We’ll cover all of them here.
Introduction
The mgmt api client contains a org.eclipse.hawkbit.mgmt.client.scenarios.GettingStartedDefaultScenario class that sets up some data. We’ll customize this data to suit our needs.
Software modules and types
We start with software module types and software modules
Hawkbit comes with a SoftwareModuleTypeResourceClient that we can use to create softwaremoduletypes
/**
 * Client binding for the oftwareModuleType resource of the management API.
 */
@FeignClient(url = "${hawkbit.url:localhost:8080}/rest/v1/softwaremoduletypes")
public interface SoftwareModuleTypeResourceClient extends SoftwareModuleTypeRestApi {

}
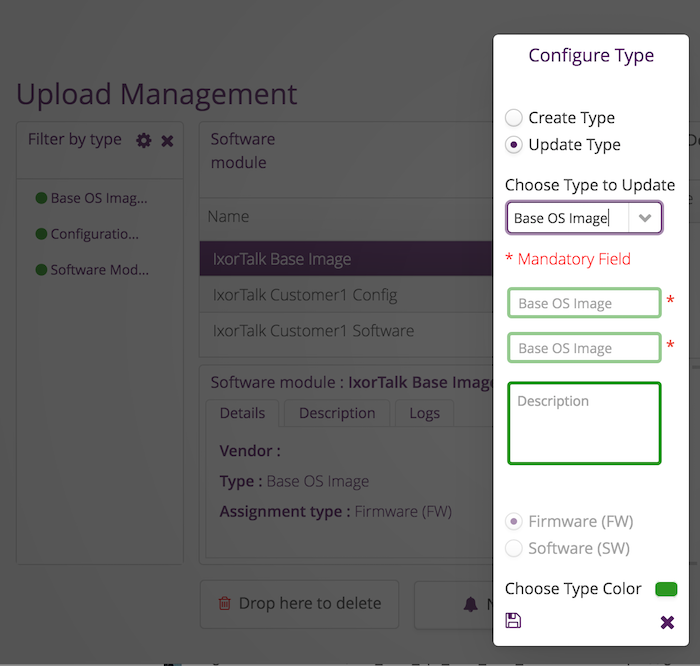
We start by creating 3 software module types. A software module type is simply a name.
Note : Unclear at this point what the firmware / software distinction refers to.
String softwareModuleType1 = "Base OS Image";
String softwareModuleType2 = "Software Module";
String softwareModuleType3 = "Configuration Module";

LOGGER.info("Creating software module type {}", softwareModuleType1);
final List<SoftwareModuleTypeRest> createdSoftwareModuleTypes1 = softwareModuleTypeResource
        .createSoftwareModuleTypes(
        		new SoftwareModuleTypeBuilder().key(softwareModuleType1).name(softwareModuleType1).maxAssignments(1).build())
        .getBody();

LOGGER.info("Creating software module type {}", softwareModuleType2);
final List<SoftwareModuleTypeRest> createdSoftwareModuleTypes2 = softwareModuleTypeResource
        .createSoftwareModuleTypes(
        		new SoftwareModuleTypeBuilder().key(softwareModuleType2).name(softwareModuleType2).maxAssignments(1).build())
        .getBody();


LOGGER.info("Creating software module type {}", softwareModuleType3);
final List<SoftwareModuleTypeRest> createdSoftwareModuleTypes3 = softwareModuleTypeResource
        .createSoftwareModuleTypes(
        		new SoftwareModuleTypeBuilder().key(softwareModuleType3).name(softwareModuleType3).maxAssignments(1).build())
        .getBody();
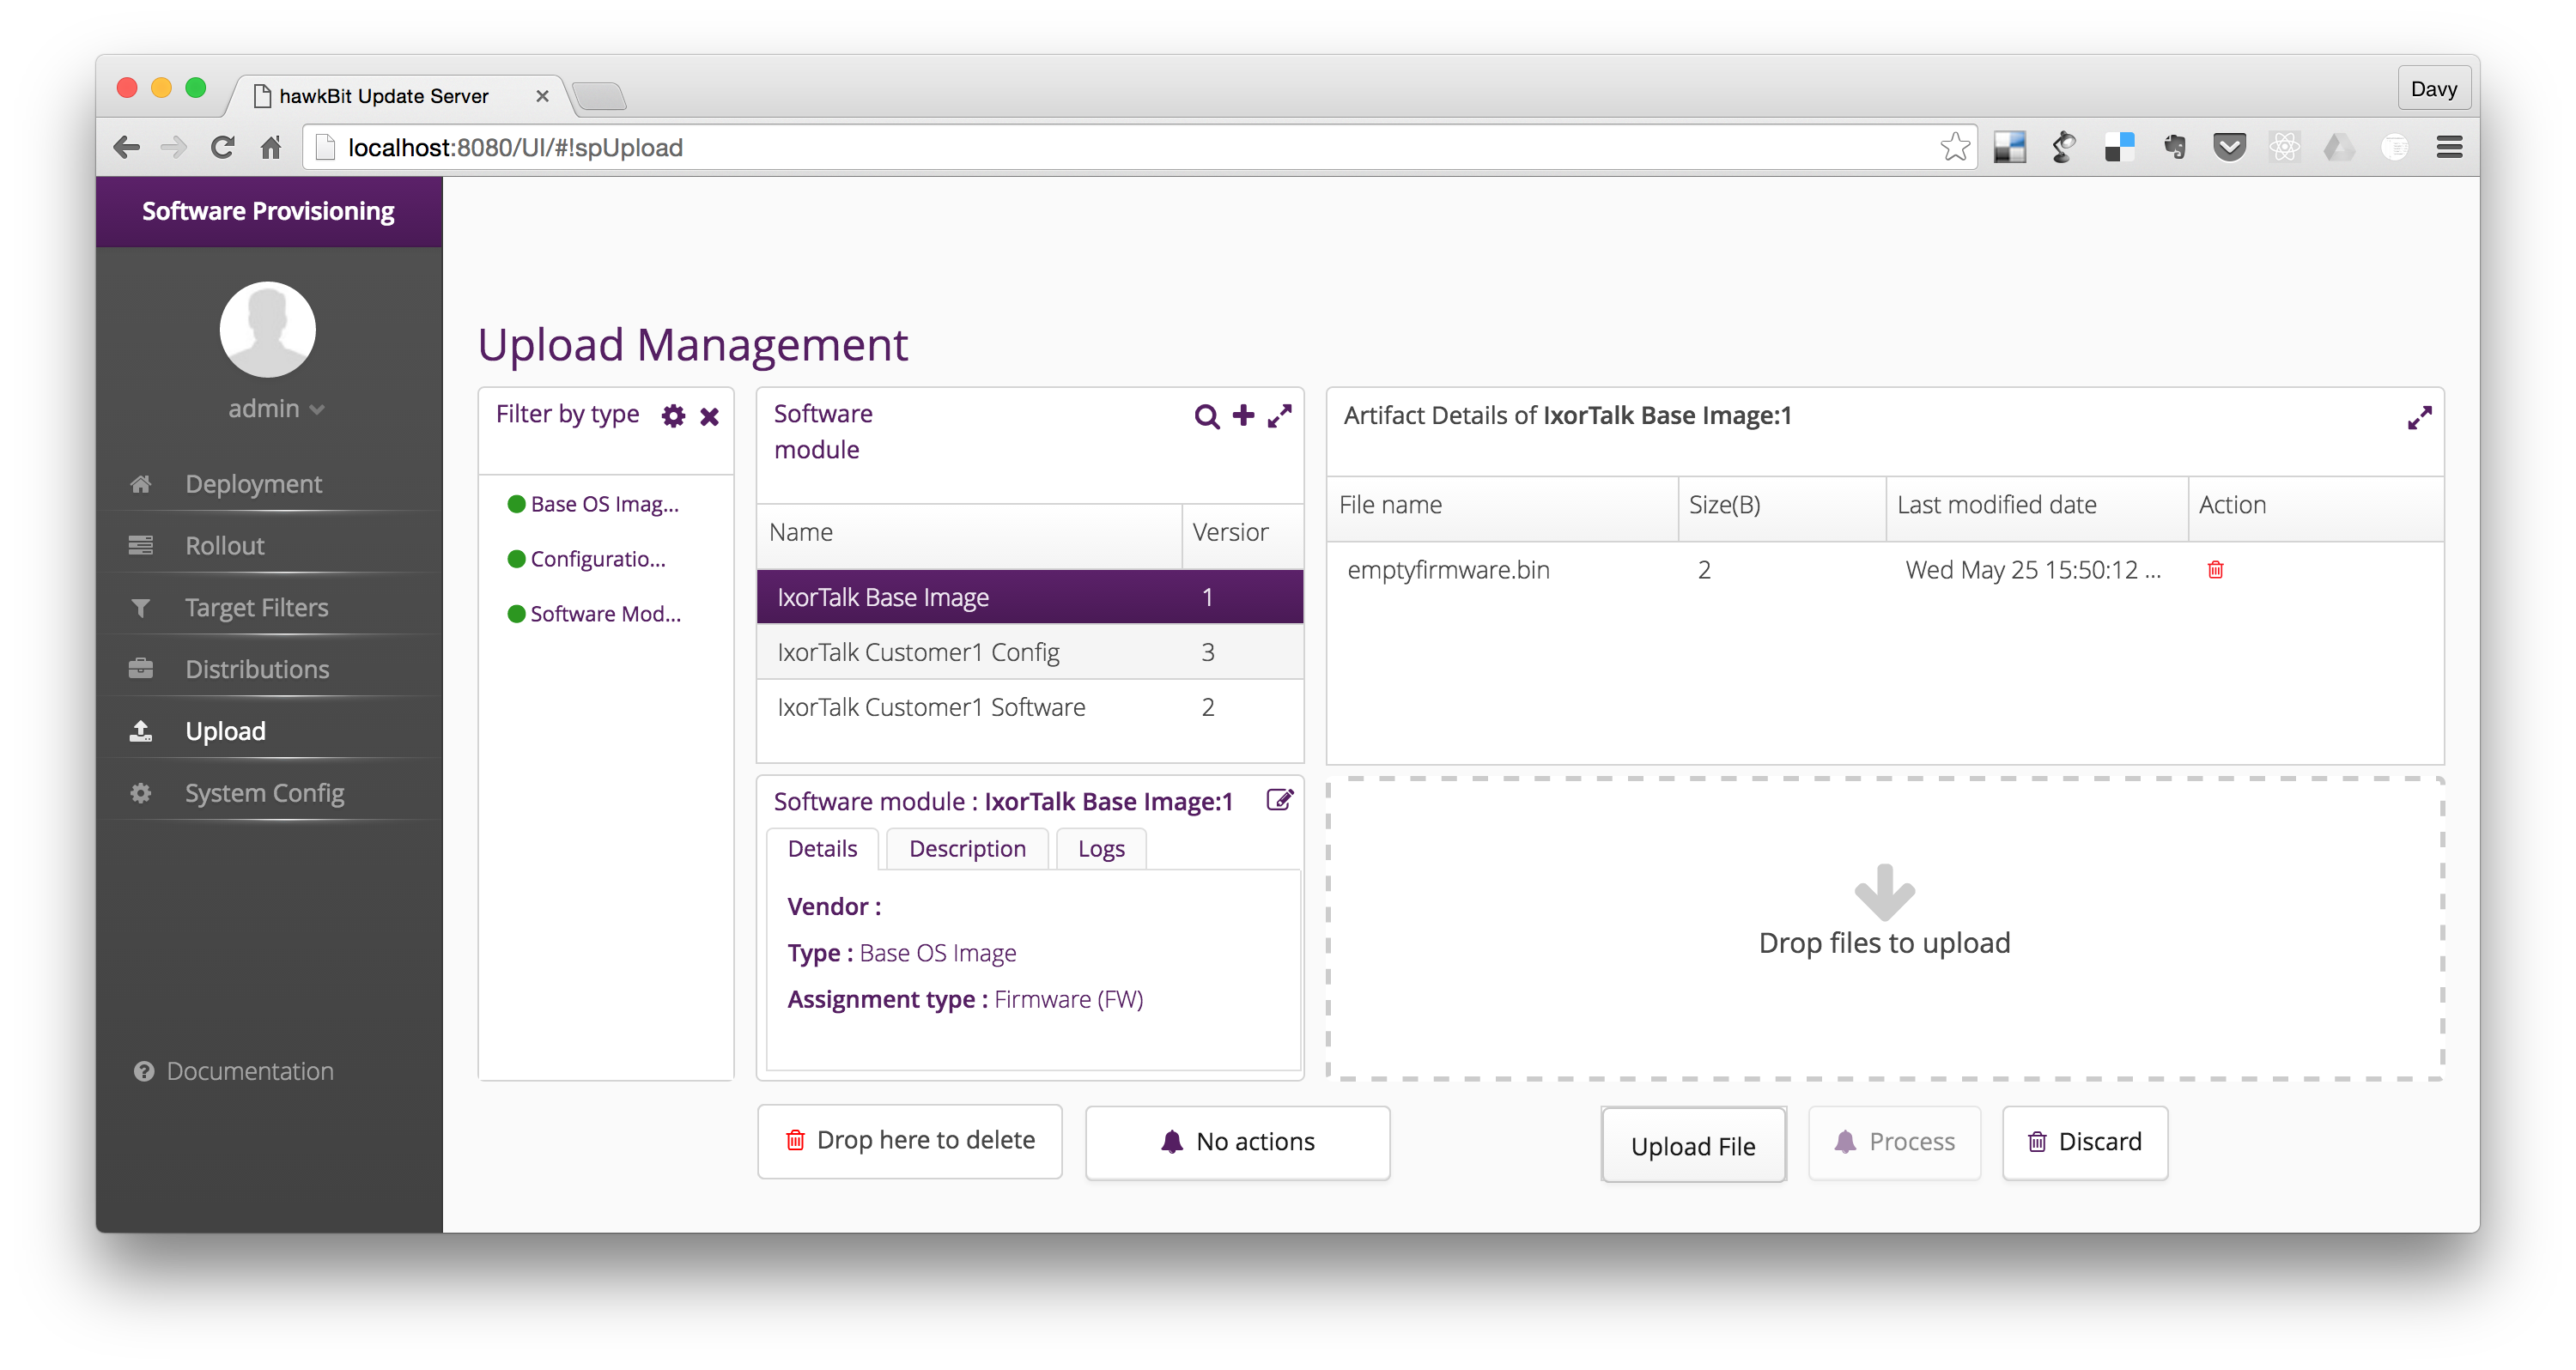
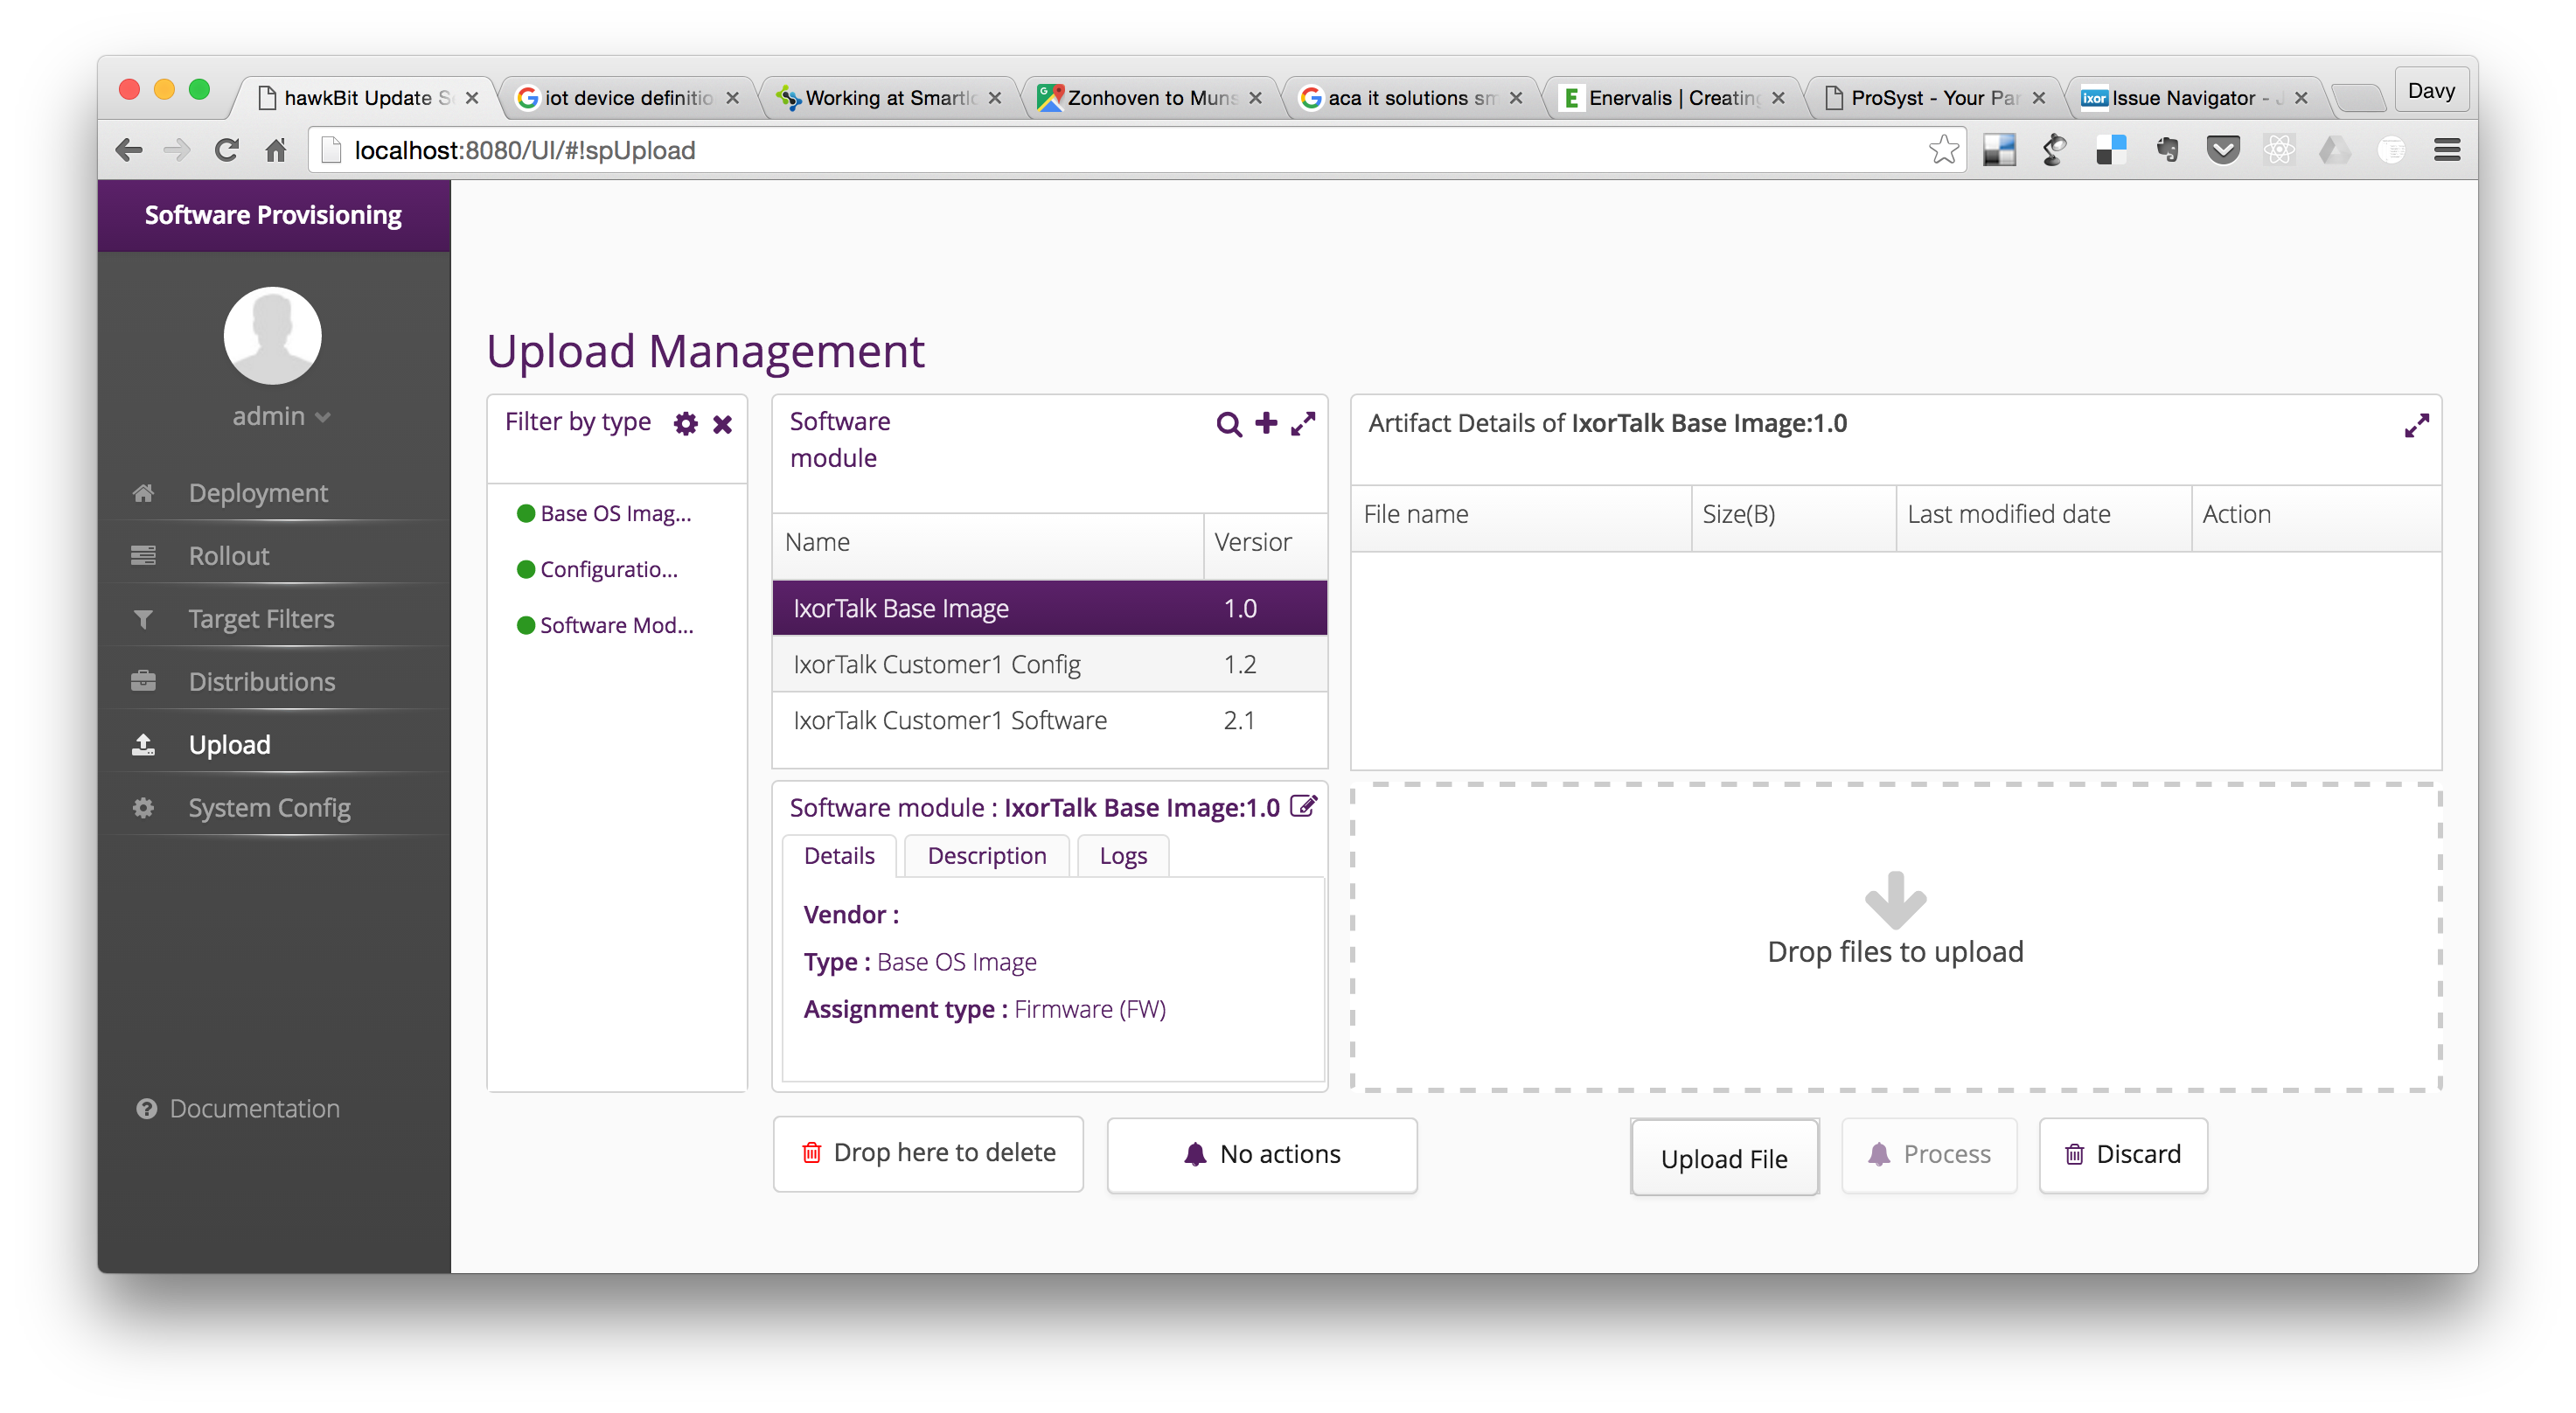
With the 3 software module types created, we can start creating our actual software modules based on those types.
A software module has a version.
final String softwareModule1 = "IxorTalk Base Image";
final String softwareModule2 = "IxorTalk Customer1 Software";
final String softwareModule3 = "IxorTalk Customer1 Config";

final String swVersion1 = "1.0";
final String swVersion2 = "2.1";
final String swVersion3 = "1.2";

LOGGER.info("Creating software module {}:{}", softwareModule1, swVersion1);
final List<SoftwareModuleRest> softwareModulesRest1 = softwareModuleResource.createSoftwareModules(
        new SoftwareModuleBuilder().name(softwareModule1).version(swVersion1).type(softwareModuleType1).build())
        .getBody();
LOGGER.info("Creating software module {}:{}", softwareModule2, swVersion2);
final List<SoftwareModuleRest> softwareModulesRest2 = softwareModuleResource.createSoftwareModules(
        new SoftwareModuleBuilder().name(softwareModule2).version(swVersion2).type(softwareModuleType2).build())
        .getBody();
LOGGER.info("Creating software module {}:{}", softwareModule3, swVersion3);
final List<SoftwareModuleRest> softwareModulesRest3 = softwareModuleResource.createSoftwareModules(
        new SoftwareModuleBuilder().name(softwareModule3).version(swVersion3).type(softwareModuleType3).build())
        .getBody();
Distribution Set Type
Distribution Set Types define the different Distribution Sets that we can create.
The Distribution Set Type defines what type of Software Module Types we can assign to this Distribution Set Type.
Note : Discuss manadatory / optional components.
Here we are going to create 5 different distribution set types. They represent some combinations that we’ll allow.
String distributionSetType1 = "IxorTalk OS Image";
String distributionSetType2 = "IxorTalk OS Image with optional Software";
String distributionSetType3 = "IxorTalk OS Image with optional Software / Config";
String distributionSetType4 = "IxorTalk Software";
String distributionSetType5 = "IxorTalk Config";
String distributionSetType6 = "IxorTalk Software and Config";


// create one DistributionSetType
LOGGER.info("Creating distribution set type {}", distributionSetType1);
distributionSetTypeResource.createDistributionSetTypes(new DistributionSetTypeBuilder().key(distributionSetType1)
        .name(distributionSetType1).mandatorymodules(
        		createdSoftwareModuleTypes1.get(0).getModuleId()
        		).build());

LOGGER.info("Creating distribution set type {}", distributionSetType2);
distributionSetTypeResource.createDistributionSetTypes(new DistributionSetTypeBuilder().key(distributionSetType2)
        .name(distributionSetType2).mandatorymodules(
        		createdSoftwareModuleTypes1.get(0).getModuleId(),
        		createdSoftwareModuleTypes2.get(0).getModuleId()
        		).build());

LOGGER.info("Creating distribution set type {}", distributionSetType3);
distributionSetTypeResource.createDistributionSetTypes(new DistributionSetTypeBuilder().key(distributionSetType3)
        .name(distributionSetType3).mandatorymodules(
        		createdSoftwareModuleTypes1.get(0).getModuleId(),
        		createdSoftwareModuleTypes2.get(0).getModuleId(),
        		createdSoftwareModuleTypes3.get(0).getModuleId()
        		).build());

LOGGER.info("Creating distribution set type {}", distributionSetType4);
distributionSetTypeResource.createDistributionSetTypes(new DistributionSetTypeBuilder().key(distributionSetType4)
        .name(distributionSetType4).mandatorymodules(
        		createdSoftwareModuleTypes2.get(0).getModuleId()
        		).build());

LOGGER.info("Creating distribution set type {}", distributionSetType5);
distributionSetTypeResource.createDistributionSetTypes(new DistributionSetTypeBuilder().key(distributionSetType5)
        .name(distributionSetType5).mandatorymodules(
        		createdSoftwareModuleTypes3.get(0).getModuleId()
        		).build());

LOGGER.info("Creating distribution set type {}", distributionSetType6);
distributionSetTypeResource.createDistributionSetTypes(new DistributionSetTypeBuilder().key(distributionSetType6)
        .name(distributionSetType6).mandatorymodules(
        		createdSoftwareModuleTypes2.get(0).getModuleId(),
        		createdSoftwareModuleTypes3.get(0).getModuleId()
        		).build());
Distribution Set
An actual distribution set is based on the types above.
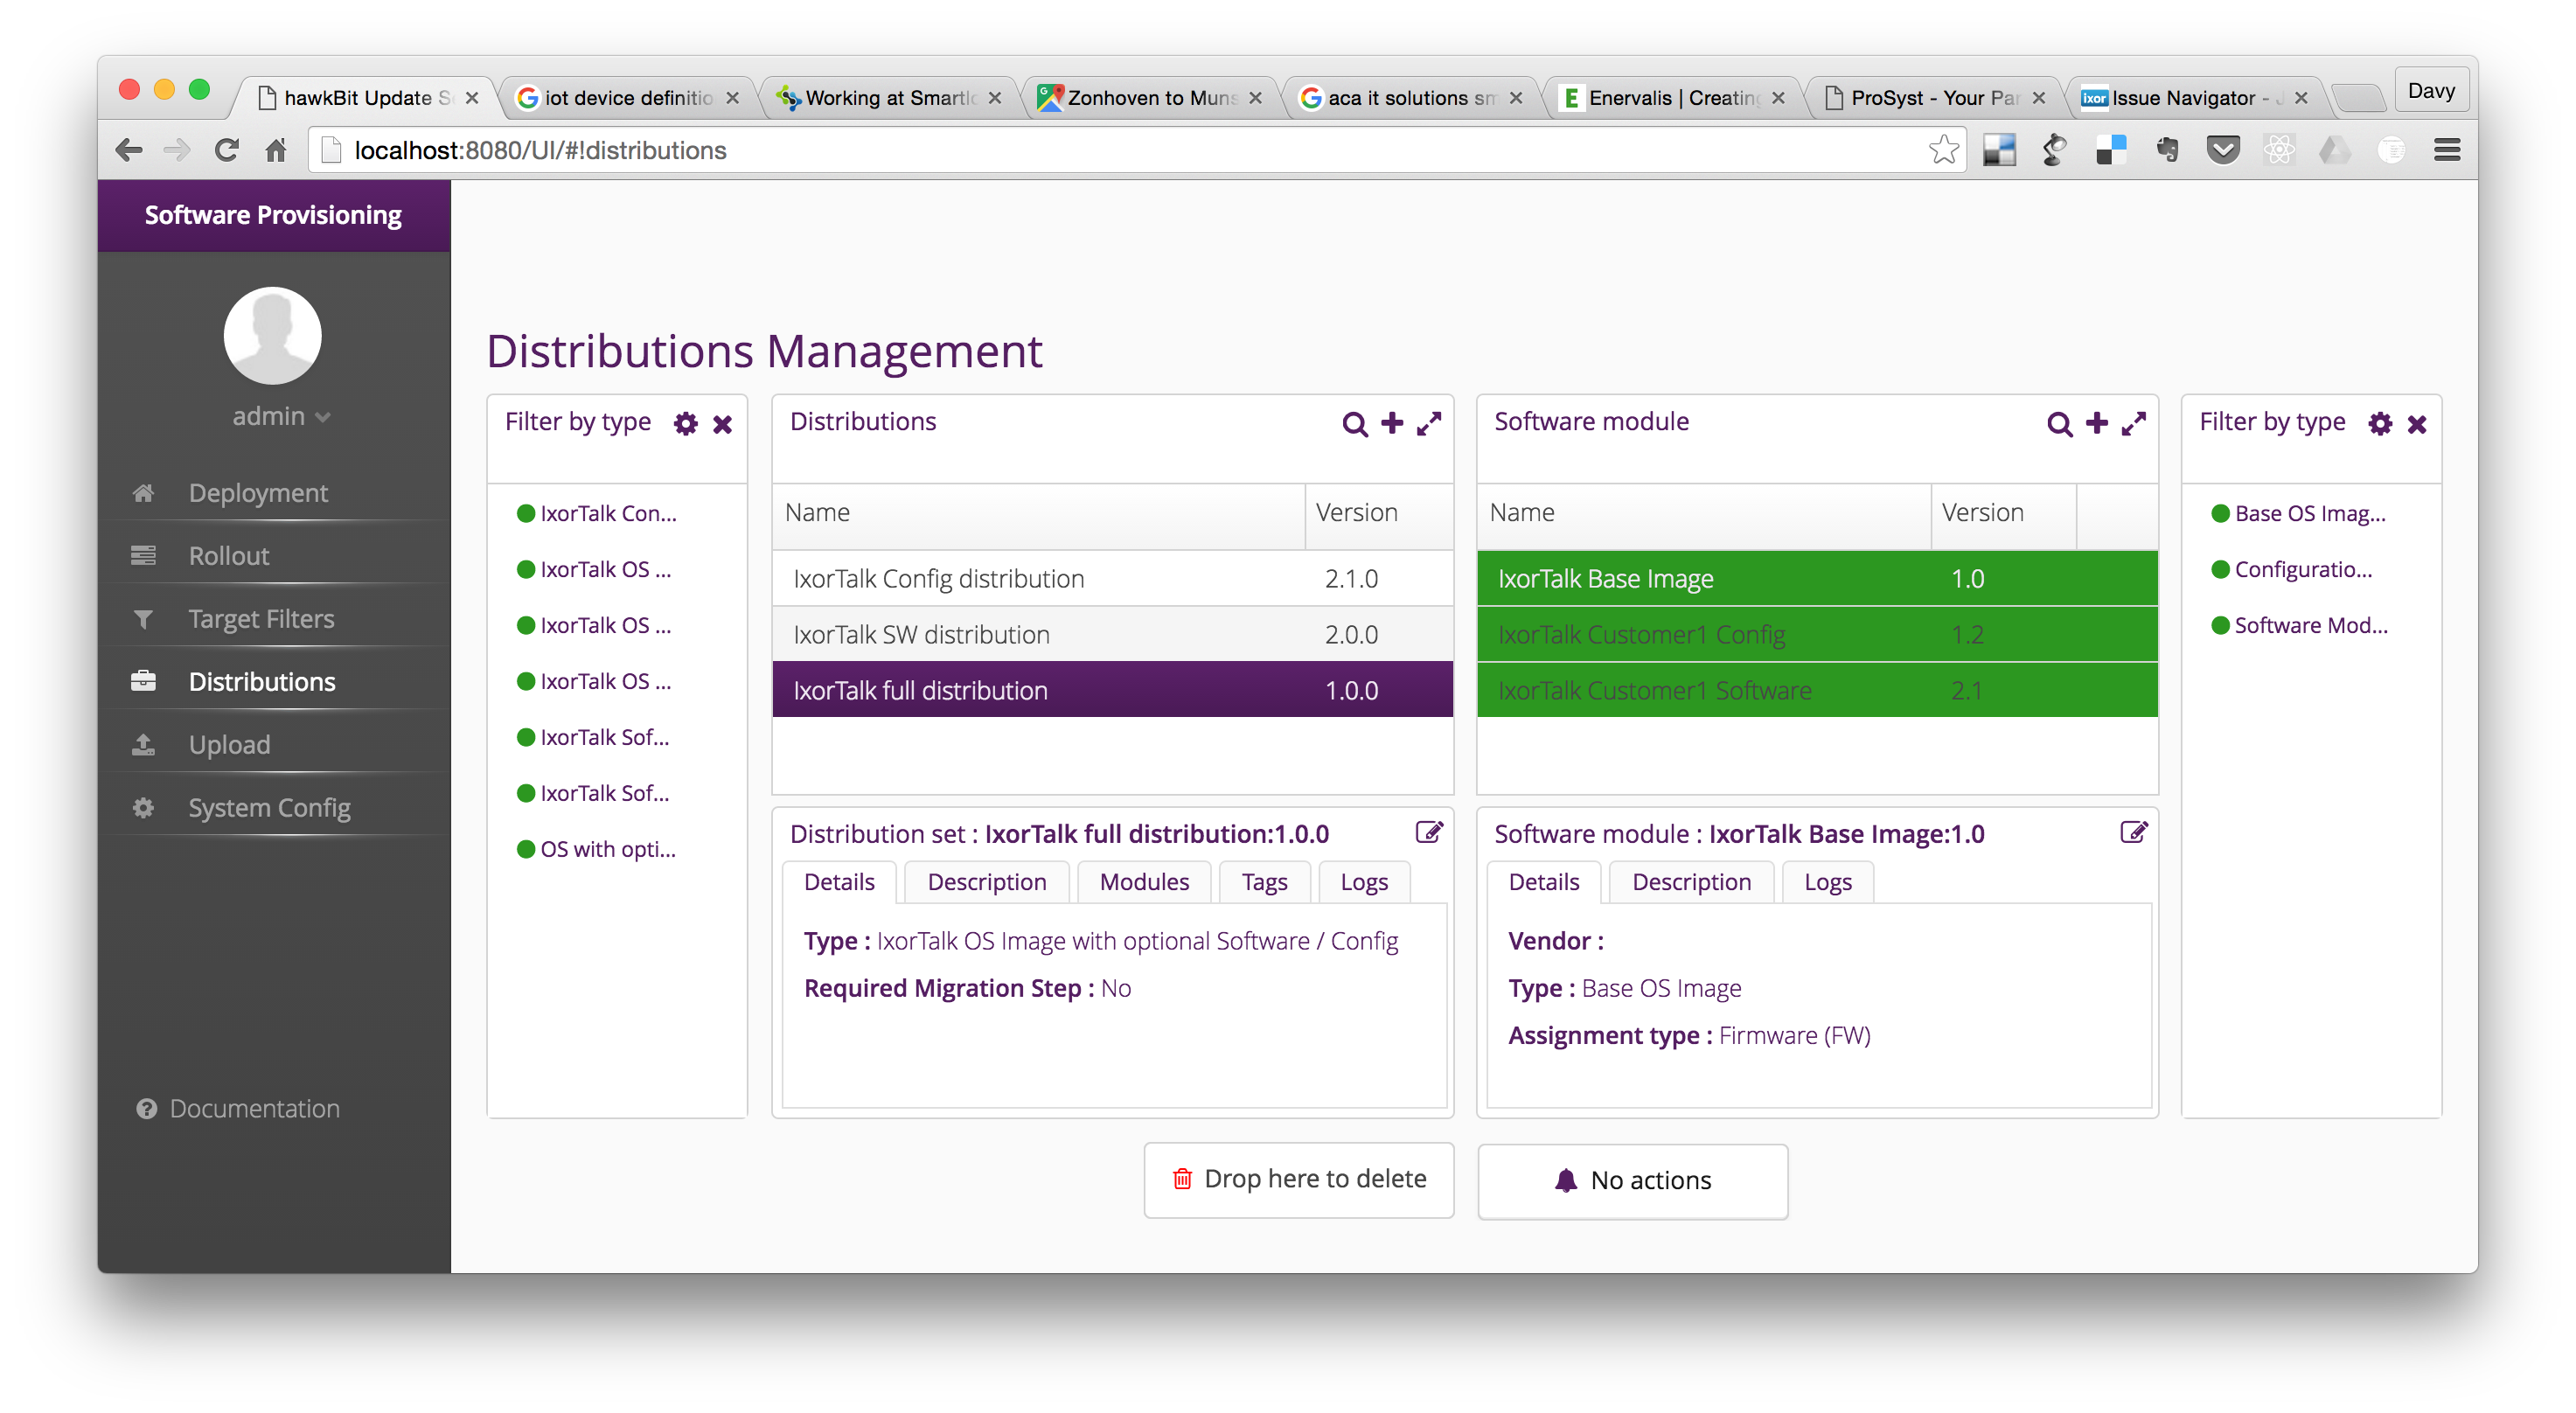
final String dsName1= "IxorTalk full distribution";
final String dsVersion1 = "1.0.0";
LOGGER.info("Creating distribution set {}:{}", dsName1, dsVersion1);
final List<DistributionSetRest> distributionSetsRest1 = distributionSetResource.createDistributionSets(
        new DistributionSetBuilder().name(dsName1).version(dsVersion1).type(distributionSetType3).build())
        .getBody();

final String dsName2= "IxorTalk SW distribution";
final String dsVersion2 = "2.0.0";
LOGGER.info("Creating distribution set {}:{}", dsName2, dsVersion2);
final List<DistributionSetRest> distributionSetsRest2 = distributionSetResource.createDistributionSets(
        new DistributionSetBuilder().name(dsName2).version(dsVersion2).type(distributionSetType4).build())
        .getBody();

final String dsName3= "IxorTalk Config distribution";
final String dsVersion3 = "2.1.0";
LOGGER.info("Creating distribution set {}:{}", dsName3, dsVersion3);
final List<DistributionSetRest> distributionSetsRest3 = distributionSetResource.createDistributionSets(
        new DistributionSetBuilder().name(dsName3).version(dsVersion3).type(distributionSetType5).build())
        .getBody();
Once the distribution types are created, we can start assigning software modules to them
LOGGER.info("Assign software module {}:{} to distribution set {}:{}", softwareModule1, swVersion1,
        dsName1, dsVersion1);
distributionSetResource.assignSoftwareModules(distributionSetsRest1.get(0).getDsId(),
        new SoftwareModuleAssigmentBuilder()
			.id(softwareModulesRest1.get(0).getModuleId())
			.id(softwareModulesRest2.get(0).getModuleId())
	        .id(softwareModulesRest3.get(0).getModuleId())
			.build());

LOGGER.info("Assign software module {}:{} to distribution set {}:{}", softwareModule2, swVersion2,
		dsName2, dsVersion2);
distributionSetResource.assignSoftwareModules(distributionSetsRest2.get(0).getDsId(),
        new SoftwareModuleAssigmentBuilder()
			.id(softwareModulesRest2.get(0).getModuleId())
			.build());

LOGGER.info("Assign software module {}:{} to distribution set {}:{}", softwareModule3, swVersion3,
		dsName3, dsVersion3);
distributionSetResource.assignSoftwareModules(distributionSetsRest3.get(0).getDsId(),
        new SoftwareModuleAssigmentBuilder()
	        .id(softwareModulesRest3.get(0).getModuleId())
			.build());
Full code


